
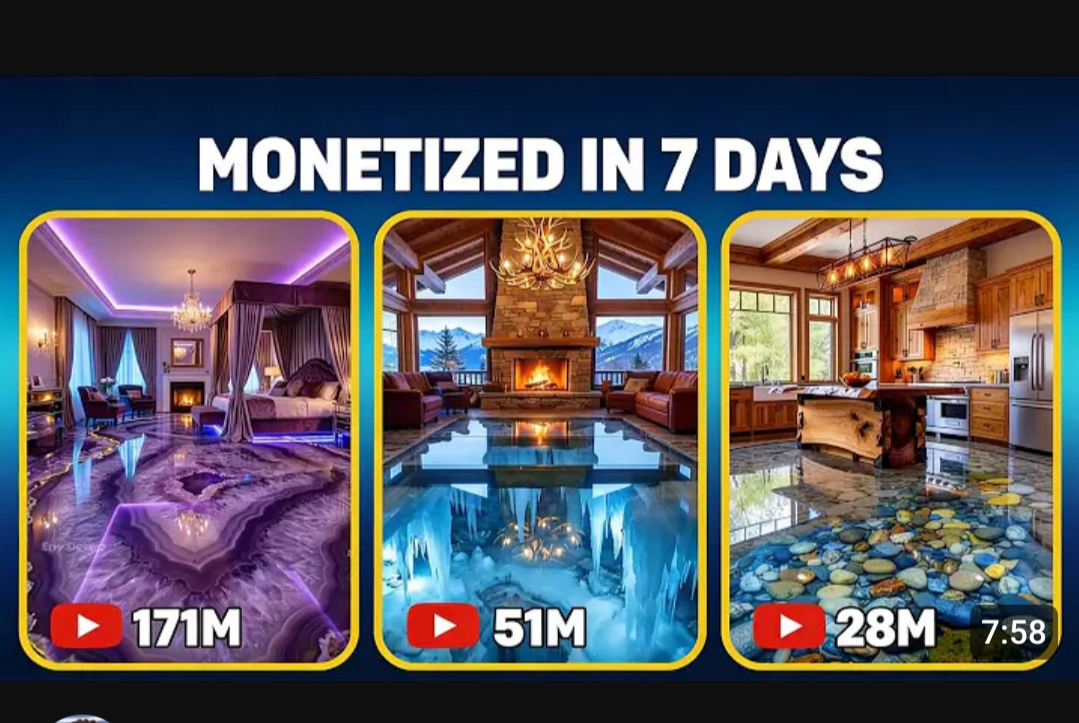
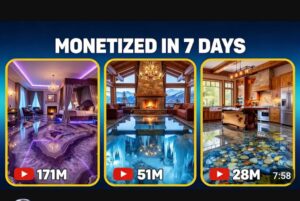
Epoxy floor transformation videos consistently rank among the most engaging content online. The glossy finish, the dramatic before-and-after, and the flowing resin patterns make them incredibly satisfying to watch.
That’s why these videos perform so well on YouTube Shorts, Tiktok, Instagram Reels, and Facebook. Within seconds, they spark curiosity, satisfaction, and visual pleasure.
The best part?
You no longer need a warehouse, a camera crew, or real epoxy materials to create these viral videos.
With the right AI tools, you can now produce realistic epoxy floor transformation videos for free — videos that look exactly like they were filmed on a real job site.
In this guide, you’ll learn step by step how to:
- Create realistic epoxy scenes with AI
- Turn images into motion videos
- Structure your scenes for maximum engagement
- Optimize your videos for views and virality
Why Epoxy Floor Videos Go Viral
Before we talk about tools, you need to understand why this niche is so powerful.
Epoxy floor videos trigger three strong viral drivers:
- Visual transformation — from rough concrete to a luxurious mirror finish
- Satisfying process — viewers enjoy watching every step
- Perceived craftsmanship — people feel like they’re learning something valuable
These videos often get millions of views because people watch them to the end. And watch time is the number one factor for virality on short-form platforms.
The good news? You can recreate this entire process using AI — without filming anything in real life.
Step 1: Understand the Structure of a Viral Epoxy Video
Almost every viral epoxy video follows the same story:
- Dirty or dull concrete floor
- Workers preparing the surface
- Mixing the epoxy resin
- Pouring the epoxy
- Spreading and leveling
- Final glossy result with reflections
This transformation story is what makes the video addictive. Do not create random scenes. Follow this flow exactly.
Step 2: Generate Realistic Epoxy Images with AI

Start by creating ultra-realistic images for each step of the process.
Free AI image tools you can use:
- ChatGPT
- Gemini
- Copilot
- Grok AI
- Meta AI
- Bing Image Creator
- Leonardo AI (free tier)
- Playground AI
- Mage Space
Important: Generate all images in 9:16 vertical format for Shorts, Reels, and TikTok.
Example Image Prompts
Scene 1 – Before preparation
Bright modern space with large windows, dull rough concrete floor, two workers wearing safety gloves and boots inspecting the floor, tools nearby, natural light, ultra realistic, 9:16.
Scene 2 – Mixing epoxy
Close-up of workers mixing epoxy resin in a large bucket, liquid texture visible, safety gloves, industrial setting, realistic lighting reflections, 9:16.
Scene 3 – Pouring epoxy
Workers pouring shiny epoxy resin onto a concrete floor, liquid spreading smoothly, professional tools, cinematic lighting, ultra detailed, 9:16.
Scene 4 – Spreading epoxy
Worker using a floor squeegee to spread glossy epoxy, smooth reflections, realistic shadows, modern interior, 9:16.
Scene 5 – Final result
Finished epoxy floor reflecting windows and walls like a mirror, luxury modern room, crystal clear reflections, ultra realistic, 9:16.
Create 5 to 8 images like this.
Step 3: Turn Images into Motion Videos (Frame-to-Video)
Now you animate the images.
Free tools for this:
- Flow AI
- Pika Labs (free credits)
- Runway (free trial)
- Pixverse
- Grok AI
- LeiaPix (depth motion)
- CapCut AI photo animation
Upload each image and use a motion prompt like this:
Motion Prompt Example:
Slow camera movement from left to right. Workers’ hands move slightly while spreading epoxy. The liquid reflects light as the camera moves. Realistic lighting shifts. Cinematic feel.
Export each clip at 3 to 5 seconds.
Step 4: Arrange Clips to Tell the Story
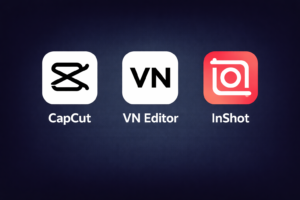
Use free editors like:
- CapCut
- VN Editor
- InShot
Arrange clips in this order: Dirty floor → Preparation → Mixing → Pouring → Spreading → Final result
Keep transitions smooth and realistic. Avoid flashy effects.
Step 5: Add Satisfying Sound Effects
Sound is what makes these videos addictive.
Use:
- Pouring liquid sounds
- Scraping sounds
- Soft workshop ambience
- Gentle background music
Free sound sources:
- Pixabay Audio
- Mixkit
- YouTube Audio Library
Match each sound to the action on screen.
Step 6: Add Strong Text Hooks (First 2 Seconds)
The first two seconds determine whether viewers scroll away.
Use hooks like:
- “Wait for the shine at the end”
- “This floor was impossible to fix”
- “Watch this transformation”
- “You won’t believe the final result”
- “From dull concrete to mirror finish”
Place this text at the beginning.
Step 7: Optimize Titles and Hashtags for Shorts SEO
Example titles:
- Epoxy Floor Transformation You Must See
- Satisfying Epoxy Floor Process
- Concrete Floor to Mirror Finish
- Epoxy Flooring Step by Step
Hashtags:
#epoxyfloor #floorart #satisfyingvideo #constructionlife
#beforeandafter #aiart #luxurydesign
Step 8: Make It Look Real (Not AI)
To avoid the “AI look”:
- Use natural lighting in prompts
- Add small human movements
- Avoid perfect symmetry
- Include tools, buckets, gloves, and dirt
- Keep colors realistic
Realism makes viewers believe it’s real work.
Step 9: Post Consistently
Consistency trains the algorithm.
- 2 Shorts per day
- 1 TikTok per day
- 1 Reel per day
Step 10: Monetize the Views
Once you gain traction, you can earn through:
- Affiliate links for epoxy tools
- Selling epoxy training ebooks
- Promoting flooring services
- Selling shoutouts on your theme page
Many pages make money in this niche without ever touching real epoxy.
Bonus Tips to Increase Virality
- Keep videos between 15–25 seconds
- Show the glossy result within the first 5 seconds as a teaser
- Use captions (many people watch without sound)
- Reuse the same images with different motion prompts to create multiple videos
Why This Works So Well in 2026
AI video tools are now so advanced that viewers cannot tell what’s real and what’s AI-generated.
Epoxy videos are perfect for AI because:
- They focus on surfaces and reflections
- They don’t require complex facial expressions
- The transformation is the main attraction
Complete Workflow Summary
- Generate 9:16 epoxy scene images
- Convert images to motion videos
- Arrange clips in CapCut
- Add sound effects and hooks
- Optimize titles and hashtags
- Post daily
All for free.
Final Thoughts
Creating viral epoxy floor videos no longer requires cameras, workshops, or materials. With the right prompts and free AI tools, you can produce realistic, satisfying transformation videos that attract millions of views.
The secret is not the tools.
The secret is recreating the transformation story step by step.
Follow this process, and you can grow a powerful page, build a community, and monetize your content — without ever stepping onto a job site.
This is one of the easiest AI content opportunities right now, and very few people are taking advantage of it.
Start today, and let AI do the heavy lifting while you focus on going viral.